|
|
|
Concurrent Programming with Java
Lab Manual, Version 1.0, F. Astha Ekadiyanto,
2002.
The last Class for this Monitor Demonstration is the Applet Class itself. All we have to do is actually to instantiate all the components (ControlPanel, ViewCanvas, and DemoThreads) in the Applet's init() method and also schedule the repaint() methods using Timer Object in 1 seconds.
Create the MonitorDemo Class and replace with the following codes:
import java.applet.*;
import java.awt.*;
import java.awt.event.*;
import java.util.*;
/** * The class MonitorDemo demonstrates the functionality of a monitor. * @author Stephan Fischli * @version 1.0 */ public class MonitorDemo extends Applet { /** * The number of threads. */ private int nthreads = 3; /** * The view canvas. */ private ViewCanvas canvas; /** * The control panel. */ private ControlPanel panel; /** * Creates a MonitorDemo object. */ public void init() { // get parameters try { nthreads = Integer.parseInt( getParameter( "nthreads" ) ); } catch ( Exception e ) {} // create threads
Object monitor = new Object();
DemoThread[] threads = new DemoThread[nthreads];
for ( int i = 0; i < nthreads; i++ )
threads[i] = new DemoThread( monitor );
        // initialize frame
        setBackground( Color.white );
        setLayout( new BorderLayout() );
        // add view canvas
        canvas = new ViewCanvas( threads );
        add( canvas, BorderLayout.CENTER );
        // add control panel
        panel = new ControlPanel( threads );
        add( panel, BorderLayout.SOUTH );
        // create timer task
        new Timer().schedule( new TimerTask() {
             public void run() { canvas.repaint(); panel.repaint(); }
        }, 1000, 1000 );
   }
}
|
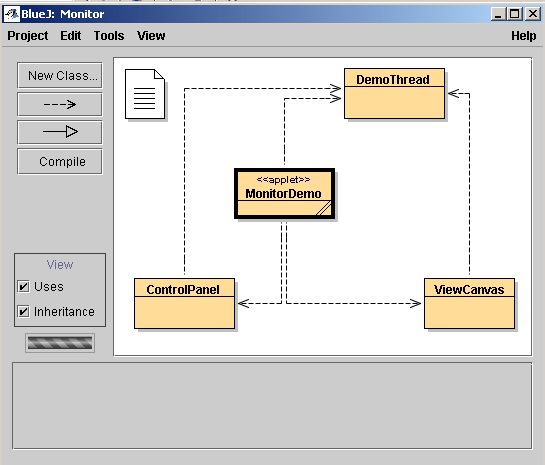
By now your BlueJ Project should have results similar to the following figure:

Once you have successfully compiled them, run the Applet and try to play with all the states and threads. Additional instruction may be given in the Class.